Author name: Rohit Khadilkar

DoFollow And NoFollow Links In SEO
SEO

DoFollow And NoFollow Links In SEO

Interested in knowing what DoFollow And NoFollow Links In SEO mean? DoFollow links and NoFollow links play an important part in the SEO of a website. In today’s article we are going to check out, what exactly DoFollow and NoFollow links are and why they are used and also what PageRank Sculpting is. We will also check out a wordpress plugin Ultimate Nofollow, which is known adding NoFollow links. DoFollow And NoFollow Links In SEO What are Dofollow Links Dofollow links are those links in a website, that are being crawled and followed by search engine crawlers. By default, virtually all the links are Dofollow. Dofollow links are commonly known as Link Juice by the SEO community. It is one of the most important factors that allows search engines to determine, how high the website should rank. Dofollow Websites/Blogs/Forums use the default Dofollow property, that helps you to boost your back-links. If you are active in a Website/Blogs/Forum which allows the Dofollow property, you will also get traffic for your own website. List Of DoFollow Website/Blogs/Forums phpBB Forum Web-hosting Forum Mysql Forum Digital Point Forum Site Point Forum What is my IP Ubuntu forum Chronicle Forum Windows Forum SEOChat forum Cheftalk forum GardenWeb Forum FileZilla Forum AntiOnline Forum XDA Developers Forum V7nForum Joomla Forum CNET Forum Business Advice Forum IDPF Forum What are Nofollow Links Nofollow links are exactly opposite of Dofollow links where you can request the search engines to not crawl and follow the links. For implementing this, a HTML code can be added to a link, to let the search engines know, that the link should not be crawled or followed. HTML is the formatting language. The <a> element is an element within HTML that holds the properties of a link. The rel=”Nofollow” is a value of the rel attribute. It asks search engines not follow a link. href attribute specifies the URL of the page the link goes to. Ultimate Nofollow Plugin Ultimate Nofollow Plugin is like a gift to bloggers, it allows you to quickly add a Nofollow tag. Its also helps you to add Nofollow link attributes to all links in the comments. You will have to install & activate this plugin. After activation, it will automatically add a Nofollow option box in WordPress. In case you don’t know how to install & activate a WordPress plugin then check out our post on how to install and activate a WordPress plugin. What is PageRank Sculpting? There was a certain controversies, associated with Nofollow. Google has an algorithm that decides the quality of any websites. To put it in simpler terms, search engines decide the ranking of a particular website, depending on the quality of inbound links to that website. Nofollow value interferes with Google’s ability to see the quality of different pages within the website. This is ‘PageRank sculpting’. Google has now updated its algorithm to deal with these attempts. Conclusion DoFollow And NoFollow Links In SEO in SEO play a major part in the over all SEO of a website, so ignoring these would not be a smart option.

How to Make The Sidebar Widgets Sticky In WordPress Site
WordPress

How to Make The Sidebar Widgets Sticky In WordPress Site

Interested in knowing, how to make the Sidebar Widgets sticky in WordPress Site? Sidebar is an important area for any website. It is an area where you can set up widgets that are really important for your website. Widgets such as, “Search”, “Subscribe”, “Latest Posts” or any other promotional stuff such as advertisements. But the problem is that when you scroll down your website’s page or post, the side bar will also get scrolled with it. In this article, you will learn, how to make the Sidebar Widgets sticky, so that they are visible at all times even when you are scrolling through your page. But first let’s understand why making the sidebar widgets sticky is important for your website…! Why Make The Sidebar Widgets Sticky? Say someone is scrolling through a specific article on your website. Now, if that someone wants to search for another article from your website, then the Search Widget from the sidebar can be used. But, if the page has been scrolled down to the bottom, the Search Widget on the sidebar won’t be easily accessible in most cases. In order to make it accessible the person will have to scroll up again & find the Search Widget. This will not just irritate the person but there are high chances that the person will exit your website. To avoid this from happening, you will have to make your Search Widget on the sidebar sticky, so that, it is visible at all times. How to Make The Sidebar Widgets Sticky In WordPress Site For making the Sidebar Widgets sticky, there is a plugin named Q2W3 Fixed Widget for WordPress. You can simply install & activate the plugin in your WordPress website & it will do the trick for you. Install The Plugin From your WordPress Dashboard go to Plugins => Add New => search for Q2W3 Fixed Widget for WordPress. Install & Activate the plugin. In case your don’t know how to install & activate a WordPress plugin then, check out the article on how to install & activate a WordPress plugin. Change The Settings After installing & activating the plugin, go to Appearance => Fixed Widget Options. You will get various General Options such as, Margin Top Margin Bottom Stop ID Refresh interval Disable Width Disable Height You will also find a few Compatibility Options such as, Auto fix widget ID Disable Mutation Observer Enable the plugin for logged-in users only Inherit widget width from the parent container Use jQuery(window).load() hook You can also enter the Custom HTML IDs for each Widget that you want to make sticky. Go ahead & fill in the options as per your specifications, if you please & then click on the Save Changes button. But for now, we are going to keep all these options as it is, since, in most of the cases the default options are good enough. Implement The Plugin Now say that you want to make your Search Widget from the sidebar sticky. Go to Appearance => Widgets => select your Search Widget. To make the Search Widget sticky simply check the CheckBox in side of Fixed Widget & click on Update. Go Live & Check Go to your live website & scroll down to the footer to check if the plugin has worked & your Search Widget on the sidebar has become sticky. Conclusion WordPress is a blessing in disguise for bloggers & website owners throughout the world. The reason behind it is that there are hundreds of thousands of plugins available for all kind of functionalities. “Q2W3 Fixed Widget for WordPress” is one of the best plugins for making your widgets on the sidebar sticky. Just like the Search Widget on the sidebar that we made sticky & floating, you can make any other widget sticky & floating. “Q2W3 Fixed Widget for WordPress” works equally well with all the widgets on the sidebar.

How to Change or Remove Howdy From WordPress Site
WordPress

How to Change or Remove Howdy From WordPress Site

Interested in knowing, how to change or remove Howdy from WordPress Site? When you log in to your WordPress site, you are greeted by the phrase ‘Howdy, admin’. Now, some people want to remove or change the greeting & it can be achieved in a very easy way. Why Do Some People Want To Change or Remove Howdy Whenever someone logs in to their WordPress website, they are greeted by the word ‘Howdy’ followed by their display name near the top right corner of the dashboard. Now, the display name can be ‘admin’ or ‘Rohit’ or anything else. ‘Howdy’ is short form for ‘How do you do?’ This greeting ‘Howdy’ might sound cool for some people, but many English speaking persons never use the word. It may even sound rude to them. WordPress is such a people’s website that, you can change anything & everything in it as per your specifications. Greeting is no exception. You can change it from ‘Howdy’ to ‘Hi’, ‘Hello’, ‘Welcome’ or anything else that you want. You can completely remove the ‘Howdy’ as well, so that, it shows only the name of the person who is logged in. How to Change or Remove Howdy From WordPress Site Without further ado, lets check out the methods to change or remove ‘Howdy’ from the Dashboard. Remove ‘Howdy’ Using a Plugin 1). First & foremost, you need to Install and Activate the Admin Trim Interface plugin. In case you don’t know how to install & activate a WordPress plugin, please check out our post on, how to install & activate a WordPress plugin. 2). After you have activated the plugin, go to the Appearance => Admin Trim Interface page in your WordPress dashboard. 3). All you need to do now is click the Hide “Howdy”? checkbox, and then click the Save Changes button. 4). Now, check out the top of the screen, you will realize that the ‘Howdy’ greeting has been removed from the Dashboard. Change ‘Howdy’ Using a Plugin 1). For this method, you need to Install & Activate the Admin Customizer plugin. In case you don’t know how to install & activate a WordPress plugin, please check out our post on, how to install & activate a WordPress plugin. After you have activated the plugin, go to the Settings » AS Admin Customizer page in your WordPress dashboard. To change the greeting, you’ll need to click on the Dashboard Section button. 2). Now, type the greeting you want (in our case it would be ‘Welcome’) in the Update the Howdy Text Textbox & then click on Save Changes button. 3). Now check your Dashboard for the changes you made. Remove ‘Howdy’ Using Code At the outset, we would like to mention that, if you are new to WordPress & don’t have coding knowledge, you should go for the plugin method. There is a chance that your WordPress website might break if the code is not implemented properly. Anyway, lets get back to removing ‘Howdy’ from your WordPress website’s Dashboard with the help of a code. Go to Appearance => Theme Editor in your WordPress Dashboard. Copy the following code at the end of your functions.php file & click on Update File, You will realize that the ‘Howdy‘ text has been removed from you Dashboard. Change ‘Howdy’ Using Code For changing the ‘Howdy’ greeting to ‘Welcome’ in your WordPress Dashboard, go to Appearance => Theme Editor. Copy the following code at the end of your functions.php file & click on Update File, You will realize that the ‘Howdy‘ text has changed to ‘Welcome’ in your Dashboard. Conclusion WordPress is the best Content Management System out there & you can customize it as you want. If you don’t like the current settings of your blog then, make it as per your own specifications.

How To Add Footnotes In Your Blog Posts
WordPress

How To Add Footnotes In Your Blog Posts

Do you want to know, how to add footnotes in your blog posts? Well, you have come to the right place for the answer. First, let’s understand what footnotes are & why do we need them. What Are Footnotes And Why We Need Them Footnotes are nothing but notes placed at the bottom of a page. They are often put there as references to a designated part of the text in the above paragraphs. It’s a common way to add citations to your content. Footnotes are generally used to add comments & provide additional information on the content that you have. By adding footnotes you website or blog can get a professional look. For example, if someone publishes a research papers, then there usually are footnotes with citations. How To Add Footnotes In Your Blog Posts So, without further ado, lets see how to add footnotes to your wordpress blog posts. Add Footnotes By Using A WordPress Plugin The simplest way to add footnotes to your blog posts is by using a WordPress plugin. We will be using the footnotes WordPress plugin, for this tutorial. There are quite a few plugins available but, footnotes WordPress plugin is relatively easy to use, offers quite a few options & is totally free. Install & Activate footnotes WordPress plugin. In case you don’t know how to install & activate a plugin check out our post on how to install & activate a WordPress plugin. Once you are done with the activation, go to Settings » footnotes from your WordPress admin panel. You will find various options to customize your footnotes. You can select the start & end shortcodes for your footnotes from the dropdown menu. Using these shortcodes, you’ll be able to add footnotes to your content. As far as you remember what shortcode to use for adding a footnote, you can start using the plugin to add footnotes in your WordPress posts and pages. The remaining settings are completely optional, so you have a choice if you want to set up everything of just the basics. Create a new post or edit an existing post to add your footnote. When you’re in the WordPress editor, simply add the shortcode you had selected for the footnotes. If say, you choose double parenthesis as your shortcode, then insert it in the content where you want to add the footnote. You can then enter any text or URL of your source in the footnote. Below is an example, You can also customize your footnotes and change their appearance completely. Go to the Settings => footnotes and click on the General settings tab. You will see the settings for choosing a numbering style. The plugin lets you choose from plain numbers, roman numerals, lower and upper case letters & much more. You can also configure the scrolling behavior of your footnotes. There are options to set up the scroll duration & add a time delay when a visitor clicks on a footnote. The default heading title for your links in the footnote will be References, but, you can change the heading title if you want. You can also choose how it is displayed in the References Container section. The plugin offers many more settings, such as showing footnotes in excerpts, configuring the URL fragment ID settings, and enabling AMP compatibility mode. When you’re done with the changes, click the Save Changes button. Now you can go to the Referrers and tooltips tab. Here you can change the backlink symbol that will appear in the footnote links. The plugin also offers settings to enable tooltips, which is a text box that shows the link of your source when a user hovers over a footnote number. You can change the tooltip position, dimensions, timing, text, and use other options for customization. In the the Scope and priority tab, you can set the priority level which determines whether footnotes will run before other plugins. Add Footnotes Manually If you are familiar with HTML, you can easily add footnotes manually in your blog posts. If you don’t have a proper knowledge of HTML then we would suggest adding footnotes with a plugin. So, the first thing that you need to do is to create a blog post or edit one that you have already created. Once you have opened the blog post in your WordPress editor head over to the content where you want your footnote to be. Now go to your paragraph block & click on the three dots menu & select the Superscript option. Again go to the three dots & click on Edit As HTML option. Now, simply go ahead and enter the following HTML code along with your superscript number, It will look something like the image below, Now for the final step, Create a heading block “References” & add the following HTML code to block at the bottom of you blog post. This will make sure that, when a user clicks on the footnote number, they will be taken to the corresponding URL. Please note that the id = “wp-posts” in our case, so we will add the following code, After you are done, Save The Changes. You can now preview the changes made. It should look something like this, Please Note: Don’t forget to replace links from this article, with your links. Conclusion Adding a footnote definitely gives a feel good factor to the website & makes it more trustworthy. The method that you want to use for creating footnotes is completely upto you. But, if you ask our opinion, we would suggest using a plugin for adding footnotes as its comparatively easy, doesn’t require coding knowledge & save a lot of time.

Create A HTML Sitemap Using Simple Sitemap WordPress Plugin
WordPress

Create A HTML Sitemap Using Simple Sitemap WordPress Plugin

Want to know, how to create a HTML Sitemap using Simple Sitemap WordPress plugin? You have come to the right place. A sitemap is nothing but a blueprint of your website or blog. If your website has a sitemap, the search engines can crawl and index all of your website’s posts & pages easily. In this article, you will learn to create a html sitemap using Simple Sitemap plugin. When you come across a Sitemap, the first thing that might come to your mind is a XML Sitemap, since sitemaps are usually made in Extensible Markup Language (XML). But, sitemaps can also be created in Hypertext Mark Up Language (HTML) So, let’s first understand the basic difference between XML Sitemap & HTML Sitemap. Difference Between XML Sitemap & HTML Sitemap The basic difference between the two is that, a XML Sitemap is designed for the search engines to crawl where as a HTML Sitemap is designed for audience to browse. Search engines such as Google can easily crawl through sitemaps made in Extensive Markup Language (XML). On the other hand, a HTML sitemap is a list of all your post & pages in a very simple & organized manner, so that the audience can go through them easily. Advantages Of HTML Sitemap Over XML Sitemap Though a XML Sitemap is prevalent for the websites today, a HTML Sitemap has it’s own advantage. HTML Sitemap Enhances User Experience As discussed above, a XML Sitemap is made for the search engines to crawl & index, but it does not give a user friendly experience, since the sitemap is made up of links. However, a HTML Sitemap has a very organized & structured way of displaying data, where the user’s can browse through the website effortlessly, since the sitemap also includes Anchor Text along with the links. HTML Sitemap Helps In SEO We all know that, meta titles and meta descriptions include keywords that are extremely useful for SEO. With the help of a HTML Sitemap, you can include these keywords in the anchor text to enhance the SEO of your website, in turn improving the ranking & making it more visible on search engines like Google. Create A HTML Sitemap Using Simple Sitemap WordPress Plugin Simple Sitemap plugin is one of the most widely used plugin in the market today. The main feature of this plugin is that, it can build and preview the sitemap directly in the post editor. Simple Sitemap helps improve your SEO ranking by automatically generating an HTML sitemap of your content. The plugin is useful to add a full sitemap literally in seconds & you don’t need to have any coding skills for that. There are also a number of features available at your disposal. Simple Sitemap is currently used by over 90,000 websites. Install & Activate the Simple Sitemap plugin in your WordPress website. Check out, how to install and activate a WordPress plugin. After you have activated the plugin, create a new page named HTML Sitemap in your WordPress website by going to Pages => Add New. The plugin will add two new blocks to your WordPress website. You can easily use these block to create a HTML Sitemap. All you need to do is click the ‘+’ on the ‘HTML Sitemap’ page icon, type ‘Simple Sitemap’ in to the text field & then select the Simple Sitemap block. There is another block named ‘Simple Sitemap Group’ that is present along with ‘Simple Sitemap’. ‘Simple Sitemap Group’ creates a branching visual sitemap. Anyway once you have added the Simple Sitemap block, it will automatically create WordPress website’s HTML sitemap. On the right side of the page, you will find options to customize. You can display Posts or Pages or both Post & Pages & also sort the sitemap by ‘Title‘, ‘Date‘, ‘ID‘, ‘Author‘ & ‘Name‘ in an ascending or descending order. You can also display the excerpt for the pages or posts listed, and enable or disable links, if you want. After you are done with setting up everything, Publish the page & Preview it. It will look something like this, Conclusion Having a HTML Sitemap along with a XML Sitemap has it’s advantages, especially when the over all SEO of your website is concerned. To make your website more user friendly for your audience & to rank higher in the Search Engine Result Pages (SERPs), include a HTML Sitemap in your WordPress Website.

Create A HTML Sitemap Using All In One SEO WordPress Plugin
WordPress

Create A HTML Sitemap Using All In One SEO WordPress Plugin

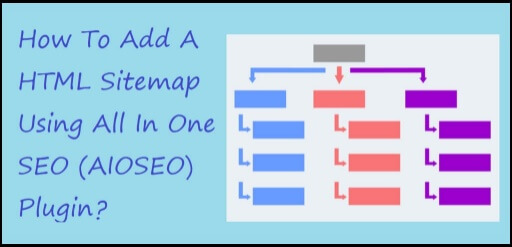
Want to create a HTML Sitemap using All In One SEO WordPress Plugin? Well, don’t worry. You have come to the right place. A sitemap is nothing but a blueprint of your website or blog. If your website has a sitemap, the search engines can crawl and index all of your website’s posts & pages easily. In this article, you will learn to create a html sitemap using the All In One SEO (AIOSEO) plugin. When you come across a Sitemap, the first thing that might come to your mind is a XML Sitemap, since sitemaps are usually made in Extensible Markup Language (XML). But, sitemaps can also be created in Hypertext Mark Up Language (HTML) So, let’s first understand the basic difference between XML Sitemap & HTML Sitemap. Difference Between XML Sitemap & HTML Sitemap The basic difference between the two is that, a XML Sitemap is designed for the search engines to crawl where as a HTML Sitemap is designed for audience to browse. Search engines such as Google can easily crawl through sitemaps made in Extensive Markup Language (XML). On the other hand, a HTML sitemap is a list of all your post & pages in a very simple & organized manner, so that the audience can go through them easily. Advantages Of HTML Sitemap Over XML Sitemap Though a XML Sitemap is prevalent for the websites today, a HTML Sitemap has it’s own advantage. HTML Sitemap Enhances User Experience As discussed above, a XML Sitemap is made for the search engines to crawl & index, but it does not give a user friendly experience, since the sitemap is made up of links. However, a HTML Sitemap has a very organized & structured way of displaying data, where the user’s can browse through the website effortlessly, since the sitemap also includes Anchor Text along with the links. HTML Sitemap Helps In SEO We all know that, meta titles and meta descriptions include keywords that are extremely useful for SEO. With the help of a HTML Sitemap, you can include these keywords in the anchor text to enhance the SEO of your website, in turn improving the ranking & making it more visible on search engines like Google. Create A HTML Sitemap Using All In One SEO WordPress Plugin AIOSEO plugin is one of the best plugins available today for search engine optimization of your WordPress website. This plugin is used by over a staggering 2 million websites. Out of the array of functionalities it has, one small functionality is to create a HTML Sitemap easily & efficiently. There are two version available for this plugin, free & paid. The free version does allow you to create a HTML Sitemap but has limited features & functionality. However, the paid version gives you more features such as SEO Schema, Smart Sitemaps & Redirection Manager. You can choose which version you want to use, as per your needs. To get the paid version, go to AIOSEO Official Website & purchase the plugin. Install & Activate All In One SEO plugin in your WordPress website. You can check out our post on, how to install & activate a WordPress plugin. Once activated, go to your WordPress admin dashboard. 1). Click on All in One SEO » Sitemaps & then click on the HTML Sitemap tab. When you are on HTML Sitemap page, turn on the Enable Sitemap toggle, if it’s not on already. 2). Now, choose how you want to display your HTML Sitemap. There are multiple options available such as, ‘Dedicated Page’, ‘Shortcode’, ‘Gutenberg Block’, ‘Widget’, ‘PHP Code’. We will be using the Dedicated Page option. Enter the URL in the text box below the “Display the sitemap on a dedicated page” label. You won’t have to create a page manually. The plugin will automatically create a new page named html-sitemap for you. 3). Now, scroll down to the HTML Sitemap Settings section. Here you will find a few settings such as ‘Post Types’, ‘Taxonomies’, ‘Sort Order’, ‘Sort Direction’, ‘Publication Date’ & ‘Compact Archives’, which you can customize as per your requirements. 4). After you have done with your customizations, click on the Save Changes button to save the changes. Now scroll up & click on the Open HTML Sitemap button. The website’s HTML Sitemap will open up. Conclusion Having a HTML Sitemap along with a XML Sitemap has it’s advantages, especially when the over all SEO of your website is concerned. To make your website more user friendly for your audience & to rank higher in the Search Engine Result Pages (SERPs), include a HTML Sitemap in your WordPress Website. You may also like, Create A Sitemap For Your WordPress Website

How To Improve Your Click Through Rate Organically
Blogging

How To Improve Your Click Through Rate Organically

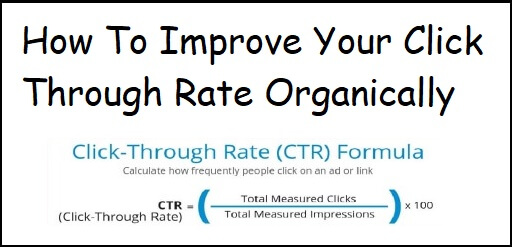
Interested in knowing, how to improve your Click Through Rate organically? If yes then, you have come to the right place. CTR is the average clicks a page gets when displayed in search results. Making your CTR better can help you do wonders for your blog in terms of getting more traffic to your website from search engines. In this article, we’ll share some awesome techniques to improve your click through rate (CTR). What Exactly Is Click Through Rate In technical terms, CTR is the number of clicks that your article receives divided by the number of times your article is shown Clicks ÷ Impressions = CTR. In layman’s terms, let’s just say, one of your articles appeared 10 times in search results for a particular keyword & received 2 clicks so your CTR would be of 20%. Search engine algorithms use CTR to analyze the performance of your website in search results. The pages with a higher click through rate usually rank higher in search results. By improving your CTR you can improve your over all SEO. You can very easily find out, what your CTR is, by going to Google Search Console. Without further ado, let’s start learning the techniques to improve your CTR organically. How To Improve Your Click Through Rate Organically Normally, you would like to start with the articles from your blog that are already ranking higher, have good search impressions, but low CTR. After that, you shift to the remaining articles. Strong Article Headlines Your article’s title is the most important aspect if you want to improve your CTR. The article title is what gets displayed in the search results. So, it has to be relevant, catchy, and engaging to get the audience’s attention and get them to click on it. There are several tools that will analyze the article titles & make suggestions to improve them. We’ll be using the MonsterInsights plugin since it has a built-in headline analyzer. It is one of the best Google Analytics plugin for WordPress. Install and Activate the MonsterInsights plugin in your blog to use it. In case you want, check out, how to install & activate a WordPress plugin. The free version of MonsterInsights also includes Title Analyzer, so you can use that too. Or you can simply use the Free Online Headline Analyzer tool by MonsterInsights. Anyway, after installing MonsterInsights you will have to connect it with your Google Analytics account. Once it is set up properly, you can edit any article where you want to optimize the title or headline. On the post edit screen, click on the Headline Analyzer ‘H‘ button at the top right corner of the screen. This tool will analyze your article headline & give you a score & some practical tips to improve your article. Keep The SEO Titles Dynamic By default, WordPress uses your page or post title as the <title> tag in the HTML. This title tag is used by search engines to display your website on in the Search Engine Result Pages (SERPs). You can use All in One SEO plugin also known as AIOSEO to generate dynamic SEO titles for articles and pages. AIOSEO is one of the best WordPress SEO plugins out there & is currently used by almost 2 million websites improve their CTR. Please Note – Free version of AIOSEO is also available in the market. Install & Activate the AIOSEO plugin. After activation, the plugin will introduce your to a process for setting up everything. Once the setting up is done properly, you can visit All in One SEO » Search Appearance page and switch to the Content Types tab. You can make the SEO titles dynamic for all your posts, pages, products, or any other post types & this title will be used when a post or page doesn’t have its own title or description. You can also edit any post or page on your WordPress website to edit it’s SEO title and description. Simply edit the post and scroll down to the AIOSEO Settings section below the post editor. You can add a custom SEO title for your post and page. A live snippet preview of how it will look in search results, is shown in the following picture, Dynamic tags like Current Month or Year in your post titles can also be used. By doing this you won’t have to manually update them every year. After you have made all the changes don’t forget to save them by updating your post. Make Meta Descriptions Useful A meta description also known as meta description attribute or simply tag is an HTML element which summarizes the contents of your article so that the audience can know what the article is all about. The picture below shows an example of meta description. You have to personally add the meta description to each of your posts & pages, because, if your don’t then by default you will get the same meta description that you added for your website as a whole. Having said that, If you are using AIOSEO for WordPress, then you can simply provide your own SEO friendly meta description to each post& page effortlessly. While filling in the meta description do make sure that your target keywords are included. This will help your audience to know about your content better & also encourage them to click on it. URL Slugs Should Give An Outline URL slugs should give an outline of what the post is all about. In other words, it should summarize the entire post in a few words in form of a URL. Say for example, https://www.conveyarena.com/how-to-improve-your-click-through-rate-organically/ Last part of the about URL “how-to-improve-your-click-through-rate-organically” is called as URL Slug, and your WordPress website or blog automatically generates it based on your post or page title. Having said that, sometimes your post title might be too lengthy, hence making it less user friendly. In such a scenario, you can edit the slug manually to make it more

6 Best Migration Plugins For WordPress Site
WordPress

6 Best Migration Plugins For WordPress Site

Are you wondering about the 6 best migration plugins for WordPress site? You have come to the right place for getting the answer. Migrating your site can be a work of chaos. But thanks to WordPress migration plugin, which makes migrating a site a lot less of a hustle. Using WordPress Migration plugins, you don’t need to migrate your site’s files and databases manually. You just need to enter the server details at your new host. One thing to keep in mind while selecting a plugin to migrate your site is the size of your site. Not all plugins are so designed that they can migrate a larger site. For a large site, you might have to buy a pro version of some of the plugins. Many free versions allow you to migrate a small site. Trying to migrate your site to a new hosting? Get set go with these WordPress plugins to migrate your site to a new host. 6 Best Migration Plugins For WordPress Site So, without further ado, let’s check out a comprehensive list of WordPress plugins used in migrating your website to another host. Migrate Guru Migrate Guru is a free WordPress Migration plugin, which is the best option when you want to move a large site. Generally, migration plugins export your site to one or two files and then you need to upload these files to the new server. However, Migrate Guru has a very different approach. In migrate guru, you just need to enter the credentials at your new server. Migrate Guru will then verify the connection with your new host and handle the work of moving all of your site’s files to the new destination. Furthermore, it has a built-in integration with many popular WordPress hosts, but there’s also a catch all FTP option that will work with any host. It also facilitates you to run a search or replace on your database to let you change domain names as part of the migration process. Since there is no manual uploading of files, you can be sure of minimum errors. Migrate Guru claims for sites up to 200 GB in size. Hence, this plugin is most advantageous to people with large sites. Good news is, it is a free tool. All-In-One WP Migration All-in-One WP Migration is the most popular tool at WordPress.org repository. It has been installed on 44 million sites. It can be used for migration, cloning, backups etc. This plugin works differently from Migrate Guru. The plugin exports your site as a single file. You need to then download this file to your local computer. Once you’ve exported your existing site, all you need to do is create a fresh install at your destination and install the plugin again. Then, you can import the single file & the migration is complete. The plugin also includes paid integrations with a number of cloud storage locations including Dropbox, Google Drive, Amazon S3, and many more. The plugin also provides an FTP option which allows you to copy the file to any server via FTP. It lets you move the file directly to the destination server. You can also run a find/replace on your database as part of the migration process, which is helpful if you’re changing domain names. All-in-One WP Migration has a free as well as a paid version. If you have a small website then free version is enough for you. In free version, you can download the single file to your local computer and upload it to the new site. However, this approach is not good when you have a large site. For a larger site, you need to buy the paid version as the paid version allows you to move the site by exporting your site to Google drive and importing it directly to the Google Drive. Duplicator – WordPress Migration Plugin Duplicator is yet another popular site migration plugin at WordPress.org. It works similar to All-In-One WordPress Migration plugin. You can install Duplicator on your existing site. It will export your site as two files called as “Package”. Now, you need to upload these files to your new server. The migrate wizard will handle the further process. As part of the migration process, you can also run a find & replace on your database, which helps you change domain names. Just like All-In-One WordPress Migration plugin, Duplicator too has two versions – Free and Premium. Free version works well with small WordPress sites. But, when it comes to handling large sites, it is always better to go with the paid version. Paid version will export your site to cloud storage or FTP, which is a great option as you don’t need to get into hassle of manually uploading the site. Bluehost Site Migrator This is basically your web hosting service providing Bluehost providing you with a WordPress plugin, so that it’s easy for you to migrate your site. Most big players in the hosting industry have developed a WordPress plugin to migrate the sites. The advantage of using these plugins over any other plugin is how simple they make the whole process for you. These plugins are more compliant and migrates your site error free. List of other web hosting service providers that offer their own WordPress Site Migration plugins: Bluehost Cloudways SiteGround WP Engine Flywheel DreamHost Liquid Web Pantheon Pressable UpdraftPlus WordPress Backup Plugin UpdraftPlus is free WordPress Backup plugin. It is also available in pro version. The free version only lets you keep the backup of your site. But the pro version also lets you migrate your site to a different host. The approach it uses is as follows, It first creates the backup of your existing website then migrates this backup to your new destination. The UpdraftPlus Migrator will also help you change your database during the process. However, changing database is optional. And it is always good to have a backup of your website. So, even if you are not thinking of

How To Disable New User Notification Emails In WordPress
WordPress

How To Disable New User Notification Emails In WordPress

Interested in knowing, how to disable new user notification emails in WordPress? Don’t worry, you have come to the right place. Does your WordPress website have the functionality to allow various users to register? If yes then, you might know that each time a user registers, WordPress sends you an email notification. In today’s tutorial you’ll learn “how to disable these new user notification email” in your WordPress website. Why Disable New User Notification Emails In WordPress Many types of websites have a functionality such as user registration, An Online Store Multiple Author Blog Membership Website. Whenever a new user registers for such a website the owner of the website gets a “new user notification email”. In a way it’s good that the owner is aware of who is registering on the website. But on the other hand, many website owners might get annoyed with all these notification emails pouring in. If the website receives lots of new users every single day then the inbox might quickly get filled with such email notifications. Due to this, one might miss out on important emails, which are relevant & urgent. And that’s why some website owners prefer, not to receive these kind of “new user notification emails”. How To Disable New User Notification Emails In WordPress For disabling the “new user notification emails”, we are going to use a free plugin & a paid one. Manage Notification E-mails Plugin (Free) In this method, we are going to use a plugin named, Manage Notification E-mails. This is a very simple, easy to use plugin which can be utilized for stopping “new user notification emails” for your WordPress site. 1). From your WordPress Dashboard go to Plugins => Add New => search for Manage Notification E-mails. 2). Now Install & Activate the plugin. In case you don’t know how to install & activate a plugin, then check out our post on how to install & activate a WordPress plugin. 3). Once you have installed & activated the plugin, go to Settings => Notification Emails from your WordPress Dashboard. 4). Now all you have to do is to “Uncheck” the CheckBox besides the “New user notification to user” option under Core Options tab. 5). Lastly, don’t forget to save the changes by clicking the Save Changes button. Now, you are all set & done. You won’t receive any more new user notification emails in the future. WP Mail SMTP Pro Plugin (Paid) For stopping the new user notification emails, we will be using the Pro version of WP Mail SMTP, since it has the option of Email Control. 1). From your WordPress Dashboard, go to Plugins => Add New => search for WP Mail SMTP. 2). Install & Activate the WP Mail SMTP plugin. In case you don’t know how to install & activate a plugin, then check out our post on how to install & activate a WordPress plugin. 3). After you have activated the plugin, go to WP Mail SMTP => Settings & enter your License Key & then click on Verify Key. You will find this license key in your WP Mail SMTP account area. 4). Once you have verified the License Key, go to the Email Controls tab from the menu on the top in WP Mail SMTP. 5). Now, scroll down to the New User section & click on the toggle besides the Created (Admin) option, to turn it off. And then click on Save Settings. Once this setting is toggled off, website owner who is also the admin won’t receive any new user notification emails. But the new user who registered will still get an email for confirmation. Conclusion Dealing with a WordPress website is comparatively easy due to repository of plugins that it offers. If you are a newbie, you can use the free Manage Notification E-mails plugin to disable the new user notification emails. Or if you already have the paid version of WP Mail SMTP Pro plugin then, you can use that. Just by a simple step, one can stop the annoying new user notification emails completely.

7 Best Amazon Affiliate Plugins For WordPress Site
WordPress

7 Best Amazon Affiliate Plugins For WordPress Site

Looking for the 7 best Amazon Affiliate plugins for WordPress site? You landed at the best place to solve all your queries. In this article, we have talked about the best Amazon Affiliate plugins for WordPress site. Amazon Affiliate Program lists hundreds of products to get you monetize your blog. It is one of the biggest and the most popular affiliate programs in the world. There are a lot of sites out there which are reviewing the products from Amazon and getting commission on each sale. Therefore, it becomes important that you have an easy way out to boost your sales. This is where Amazon Affiliates Plugins come into picture. An Amazon Affiliate Plugin provides you with APIs to insert the product link in different format. It makes sure that the price and product details are always up to date on your site. 7 Best Amazon Affiliate Plugins For WordPress Site Moving forward, let’s have a peak into benefits and functionality of the “Best WordPress Amazon Affiliate Plugins”. AAWP (Amazon Affiliate WordPress Plugin) AAWP is one of the most popular plugins for Amazon Affiliates having WordPress website. It has great functionalities to insert the products and keep the details updated. With AAWP, you can: Insert products in different formats. Be sure that your product information is up to date, including locally caching the results. This will help you improve the performance. Geotarget the affiliate links. Create product comparison table. Add event tracking to your affiliate links.This will help track link clicks in Google Analytics. While adding the products to your website, you have a choice to either select a template from pre-built library or to customize your own template. If you are a beginner in WordPress, we strongly recommend to go with pre-built templates. This will save you a lot of time and effort. There are different ways in which you can showcase your products on the site, Text links – Just insert the basic text link on a word. Product boxes – This is the best option of all. A product box displays the image of the product, its description, price and a button. You just need to insert a shortcode to display it anywhere on your post. Bestseller lists – Makes a list of all bestselling products based on a keyword or a product group. New releases – Again, listing new products based on keyword or product group. This will make sure that your customers keep coming on your website for new updates. Data fields – Insert specific information about a product using a shortcode, such as a product’s current price. Widgets – You can also add products to your sidebar for better visibility. AzonPress AzonPress is also one of the popular plugins for Amazon Affiliates using WordPress. Just like AAWP, it too offers you use the Amazon Associates API, which makes sure the details of the products are always updates. Here, you can find some more different insertion options for your product. Also, you can make product comparison tables. Its features include: Geotargeting the affiliate links to direct audience to the optimal locale. Track affiliate link clicks. Customizing the product insertion options according to your needs. The options to insert products are same as that of AAWP. These are: Text links Product boxes Individual product elements (e.g. the price of a product via API) Product grids  Bestseller lists Widgets EasyAzon – Amazon Associates Affiliate Plugin EasyAzon Plugin is strongly recommended to people who has newly started with blogging and are on tight budget. One of the greatest advantages of EasyAzon is that it is free. Hence, a great option for people on budget. With EasyAzon, you get all the necessary features in the free version. If you want more fancy features, you need to upgrade to the pro version. Free version is a small package of all necessary features. It lets you insert affiliate links from the WordPress editor. Hence, making the process faster. Pro version has some advanced features, which include: Product Quick View – It will display the product information when you hover over it. Add to cart functionality – This feature allows your users to add the item to their cart to get the longer cookie duration. Automatic link localization – The users will be directly sent to proper locale. Amazon Auto Links Amazon Auto Links is yet another plugin for Amazon Affiliates using WordPress websites. With Amazon Auto Links, you can easily insert individual products or lists of products in your content. To insert the list of products you are provided with a shortcode. It provides different ways to insert the products: Category – It displays a dynamic feed of products in a particular category. Product search – It displays a list of products based on keyword search. Specific products – It display specific products. URL – It displays the list of items from an external URL. Like any other Amazon Affiliate Plugin, this plugin too keeps the details and prices of the product up to date. An added advantage of the plugin is that, it’s free. AmaLinks Pro AmaLinks Pro is a premium Amazon Affiliate Plugin for WordPress. This plugin too, like other plugins, uses Amazon Associates product API to insert product’s information on your site. The products can be inserted in the following ways: Text Links CTA Buttons Product Boxes Image Links You can also make a product comparison table using it’s unique addon – table builder. Table builder lets you create customizable product comparison table. It has drag-and-drop functionality to customize columns. With table builder addon, you can also mark a product as the “Top Choice”, so your users get the bestsellers at more competitive price. Moreover, AmaLinks Pro includes Google Analytics event tracking to track affiliate link clicks. AmaLinks Pro does not support geotargeting your links to different Amazon locales. However, it provides integration with Amazon OneLink and Genius Link to help you Geotag. WZone- WooCommerce Amazon Affiliate Plugin WZone is an Amazon Affiliate Plugin that works in a very different way then all other amazon affiliate plugins. Instead of inserting the

Improve Readability and SEO Performance With Yoast
SEO

Improve Readability and SEO Performance With Yoast

If you are interested in knowing, how to improve readability and SEO performance with Yoast then you have come to the right place. A blog’s readability is the first thing that will keep your readers engaged to read the full blog. If they are able to understand the blog perfectly, then there is a chance that for further assistance in the subject, they will come back to your blog. Readability and SEO of the blog can be optimized using Yoast SEO. What is Yoast SEO Yoast SEO is a WordPress plugin, that helps optimizing the content of the blogs, so it is easily accessible through search engines like Google. You will have to install & activate Yoast SEO plugin for your WordPress blog. To know how to install & activate a WordPress plugin, check out our post on, how to install and activate a WordPress plugin. Search Engine Optimization is important because blogs attract most of their traffics from search engines. So, while applying SEO tricks, you should always aim for first page of Google. Improve Readability And SEO Performance With Yoast Yoast SEO has a lot of functionality but in this article, we are going to discuss about only two – How to Improve the Readability and How to Apply SEO in a Right Way. How to Improve Readability Once you have drafted your blog and saved it, scroll down to the end of your post. Here, you’ll see a tabs name Readability. Click on the tab Readability. It will list down all the good and bad aspects about the readability of your blog. It points out silly mistakes that you make while writing like not using Sub-Headings, Paragraph Length going beyond a readable limit, not using Transition Words, etc. To identify, which part of the blog isn’t complying with required protocol, click on the eye icon. It will turn purple. Scrolling up your post, you’ll find, all the defaulting sentences being highlighted. You can make changes and improve the readability. Some aspects to note, while working on the readability are as follows, Sub-Headings I have already mentioned in my previous blog, how writing a blog post without sub-headings is a big NO! Sub-Headings are the second thing people read after Title of the blog. So, never miss it. Paragraph Length A longer paragraph length breaks the concentration of the reader and he ends up closing your blog. Sentence Length Same thing with sentences. No one can follow big sentences (until it’s a novel). Consecutive Sentences “Rita is a student. She is good in math. She also plays basketball. She lives near my house. She is a nice girl. She will not come to school tomorrow.” How did it sound? Too much “shes” right? These are called consecutive sentences. Make sure while writing a blog, you use different words in a paragraph to start a sentence. Transition Words This is one place, where people struggle the most. For most bloggers, it is still challenging to write transitional words. If it’s hard for you to use Transitional Words, then make a list of 5 words that you are going to use in your blog. Try to incorporate these words at places where they seem meaningful. Once it comes into habit, it will start reflecting naturally in your posts. But wait, what are transitional words anyway? Here, After All, Hence, Therefore, Overall, Likewise – These are transitional words. Transitional words polish the rough edges of your post and makes it look good. Passive Voice Passive voice is yet a complex work. It can only be worked upon perfectly if you are pro with grammar. If you aren’t, I suggest you to not ponder on it for long. Flesch Reading Ease It tells how difficult a passage in English is to understand. Lower scores mean that the text is hard to understand. Therefore, always write your posts in understandable way. How to Apply SEO in a Right Way If you apply SEO in the right way for your blog, you can get overwhelming results. Yoast SEO Google Preview To edit the Snippet, Click on Edit Snippet Button. You will have three fields – SEO Title, Slug and Meta Description. All three fields are customizable. At first, Title field and Slug will be auto-filled, but they can be changed if you have your own tricks in pocket. SEO Title Title is the first thing that people see on Google. Therefore, your title should give an idea about what’s inside the post. Most of the time, your SEO title is same as the title of your post but if you feel your title should be some keyword that is not the actual title of your post, you are allowed to do so. This technique might work if you are pro at SEO, though I recommend to keep it same. One thing to remember is, you cannot write a very long SEO title, there is a word limit. If your title is greater than that limit, the Google Search results will start showing three dots (…) instead of full title. The indicator line attached to title field indicates the right length to optimize title. This bar shows three colors: Red – Length is too short or too long. Amber – Okayish but not satisfactory. Green – Length is perfect. Note: If the title is short then the required length, put a separator (you can use any, it has nothing to do with SEO) and write your blog’s name. It is a good practice to write your blog’s name as it increases the authenticity of your post. Hence, more click rate. Slug Slug is part of URL that helps search engines find a blog on web. Some people get scared and do not touch the slug at all. Well, the slug should be customized when your post’s title is very fancy or long. Slug is very important as it tells the search engines, what the post is about. That’s why, it is a good practice to keep the slug simple, with the relevant keyword and short. Example: One

How To Write A Privacy Policy For Your Blog
Blogging

How To Write A Privacy Policy For Your Blog

Want to know, how to write a Privacy Policy for your blog? Blogging has become more common and essential these days. There are a variety of bloggers out there with various niches. But the one thing that they have in common is the availability of the privacy policy. It doesn’t matter about the technicality of your blog, but having a privacy policy will help you attract customers & avoid lawsuits at the same time. A good privacy policy is one with clear and simple sentences that will allow the users to understand clearly. What is a privacy policy A privacy policy is a set of laws that will allow you to cover all the global, federal, and state laws where the readers of your blog will be present. Since most of the blogs are created with universal content the best option for you is to cover all the policies in your blog policy. Having a privacy policy is essential for your blog because you will have the responsibility of protecting the reader’s identity including the cookies that the users permit while entering your blog. When a client enters the blog some of their personal detail like their name, number, browsing history, cookies, and connection ID will be shared with the blog server. These details will in turn be used by the Google AdSense installed in that blog to display suitable information. Setting up a privacy policy will allow you to get proper approval from the users and avoid lawsuits. The private details of a user are usually collected by websites or blogs during certain situations. Some of the common situations include, Entering and registering in an eCommerce website Chat websites Comment sections Sign up section Cookies Third-party services Through other social media sites Why Do You Need A Privacy Policy Since your blog will collect the personal information of the readers in detail providing a privacy policy to them and ensuring the way the information will be used is essential. Using a privacy policy for your site or blog will allow your readers to trust you to a certain extent. They will be assured about entering their personal details into your site after reading the policies. Sometime certain readers without understanding or reading the policies in detail might drop a lawsuit on you for invading their privacy. So including some detailed clauses into your website will prevent you from getting affected by the unwanted lawsuits. So make sure to include clauses representing the third party advertisers in your blog also for further protection. This will protect you from providing loopholes to the others visiting your site. How To Write A Privacy Policy For Your Blog So, without further ado, let us now view these policies in detail. Most of the people prefer to get their privacy policy to be written by some external organization. But the truth is that they can be written by yourself. But when you are writing a policy there are certain rules and regulations to be followed. Simple Language When you release a blog into the world it will be visited by people with different knowledge and educational background. So it is essential for you to use a simple English language for writing a privacy policy. This will allow the users to understand your requirements in detail. Also, when you fill your blog with unwanted and complex policies the readers will be disturbed to a greater extent and they will move away to read the same content from another blog with simple policy. So write a good policy for your website with straightforward and simple sentences. Information Usage Details When you are collecting some information from the readers it is essential for you to inform them for what purpose this information will be used. So make sure that the policy explains properly, whom will you disclose the information that you collect from them . Disclose the safety of the personal information shared by the readers in the policy. Providing the readers detailed information without allowing them a space for guessing is the perfect policy. Stating The Laws And Origin The next step you need to follow while writing a law is to mention under what categories your policies fall under. For example, your blog policies might obey state laws and federal laws but not global laws. So stating the laws that you have planned to comply with, in your policy will allow the user to get a further idea on the topic. But remember including the global laws is a necessity and provides more safety. Updates And Improvements The rules on blogs and the websites will be changing constantly which will require you to update the blog every now and then. So while you are generating a privacy policy for your blog, mention to the readers is that these policies are subject to alterations in the near future. Mentioning these in a separate line with bold characterization is essential. Third Party Policies When you are having a successful blog you will automatically think about gaining some profit in the near future. So during those situations, it is essential for you to include the third-party policies also within your policies for a detailed clarification to the clients. For example, if you have installed Google AdSense, you have to mention it in your policy and include their policy details also. This will make your privacy policy a bit complicated and lengthier but they are totally worth it. So it is essential for you to include both google analytics and Google AdSense policy within the blog’s privacy policy. Option To Leave Sometime certain customers will wish to move out of the site. During that time the privacy policy should provide them proper instructions and options to move out without any loss. Keep the policy file user friendly & give the final choice of rejecting or accepting it to the user without putting any external pressures on them. Policy Effectiveness When you are writing a policy mention in detail

Scroll to Top