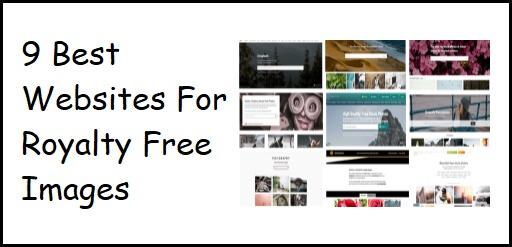
9 Best Websites For Royalty Free Images
Want to know about the 9 best websites for royalty free images? Royalty free images are the kind of images that are free to use. You must be thinking that every image online is free to use since its already available, but this is not true. There are a lot of images on the internet that are copyrighted and using such images can land you in a serious trouble. Using copyrighted material, in this particular case images, can have legal and financial ramifications. Many people use online images for personal use as well a professional use, but the people who might need to use it more often than not are bloggers. Bloggers use images to make their blogs attractive, since adding images to the posts can draw traffic to your blog and in turn make money for you through blogging. If you don’t already own a blog & are looking to create one check out our article on how to start a blog. 9 Best Websites For Royalty Free Images So here, I am going to give you a random list of famous websites where you can find royalty free images. Unsplash Unsplash is one of the most favorite websites that people use for using royalty free images. It has various categories to select the type of image you want. The categories are as follows Wallpapers Textures & Patterns Nature Current Events Architecture Business & Work Film Animals Travel Fashion Food & Drink Spirituality Experimental People Health Arts & Culture Or you can simply search for the image from the search box. You can join the website for free. You can also submit a photo that you have on the website for others to use. There is a huge collection to choose from. The list is virtually endless. Pixabay Pixabay is a vibrant community of creatives, sharing copyright free images and videos. All contents are released under the Pixabay License, which makes them safe to use without asking for permission or giving credit to the artist, even for commercial purposes. The collection on this website exceeds 1 million photos. Not just photos, it also has Illustrations, Vectors and Videos to choose from. You can also download a Pixabay app from Google Store for Android Smartphones and App Store for iPhones. Pexels Pexels provides high quality and completely free stock photos licensed under the Pexels license. All photos are nicely tagged, searchable and also easy to discover through our discover pages. They have hundreds of thousands free stock photos and every day new high resolution photos are added. All photos are hand-picked from photos uploaded by the people. You can upload photos on the website for other people to use. You can also download the Pexels app from Google Playstore for Android Smartphones and App Store for iPhones. Gratisography The world’s quirkiest collection of free high resolution pictures, comprised of the world’s best, most creative images-photos you just won’t find anywhere else. All completely free to download without copyright restrictions. There are various categories where you can choose from Animals Business Nature Objects People Urban Whimsical Gratisography focuses more on quality rather quantity. Pikwizard High Quality, Free Stock Photos. Stunning library of over 1 million stock images and videos. Royalty free and safe for commercial use, with no attribution required. Categories section contains, Abstract Aesthetic Amazing pictures Angel pictures Animal pictures Autumn Baby cats Baby images Background Baseball Basketball Beautiful Bird pictures Birthday Black and white Children playing Cloud Coffee Colorful Computer Desert background Desktop Dinosaur pictures Reshot All photos from Reshot are free for commercial and editorial use, under the Reshot License. The free stock photos on Reshot are sourced from individual contributors and via partnerships with other photography communities. Giving photo credit is not required. You are free to crop, filter, add text, or modify Reshot photos as needed. If you want to upload your photos to the website then email them and they will get you setup to have your photos reviewed. Picography Picography has been providing stunning images to millions of people for the past many years. It is now one of the top sources for gorgeous, high-resolution, free photos. You can use any of our free stock photos however and wherever you like, with no attribution required. All photos are CC0 licensed. They also accept photo submissions. If you would like to add your photos to Picography, visit their Submission Page. Skitterphoto All photos on Skitterphoto are public domain. This means that all photos are free to use for any purpose. You may download and edit photos and even use them commercially. Browse the categories or search by keywords. If you are you a photographer and you want to share your photos with people who need a photo for their blog, website or other media, join Skitterphoto. Picjumbo All photos are free to use, however, please keep in mind although the photos listed are free to download and use, some photos do not have model or property release. Some photos may also contain copyrighted brands, logos, objects or personal properties. Conclusion There are many such websites where you can get free images to take from. Bloggers in particular can benefit tremendously from these websites.