WordPress

Track And Redirect 404 Pages In WordPress Site Using AIOSEO
WordPress

Track And Redirect 404 Pages In WordPress Site Using AIOSEO

Don’t know how to track and redirect 404 pages in WordPress site using AIOSEO? 404 errors create a bad user experience. 404 errors also known as Page Not Found errors occur when the audience tries to open up a page on your website that no longer exists. This can reduce the traffic to your website affecting your sales. In this article, we will show you how to track 404 pages and redirect them in WordPress. But, lets first know what 404 or Page Not Found error is. What is a 404 or Page Not Found Error A 404 error is an HTTP status code. It means that the web page you are trying to visit is not available on the server. In layman’s terms, if you enter a URL of any web page that does not exist, then you’ll get to see a 404 error. There might be many reasons as to why this would happen. Some of them are given below, You made a mistake when entering the URL address. The post/page was deleted from the website. Domain name no longer exists. Page was moved to another URL but wasn’t properly redirected, resulting in a broken link. Server malfunctions resulting in 404 errors. Why Should You Track 404 Pages and Redirect Them Let’s discuss in detail why it’s extremely important to track 404 errors and fix them. The foremost reason is, 404 errors are bad for your website’s user experience. If audience can’t find the page they are looking for, then they will most likely leave your site and search for their query on a competitor’s website. This simply means that you’ll lose potential traffic & in turn an opportunity to convert the traffic into subscribers & buyers. Apart from that, 404 errors have a negative impact on your website’s SEO rankings as well. Google Search Engine ranking algorithm penalizes websites that have broken links. These broken pages will also cause you to lose valuable backlinks from other website, which will decrease the Domain Authority of your website. Now, let’s take a look at how you can easily track 404 pages and redirect them using AIOSEO plugin. Track And Redirect 404 Pages In WordPress Site Using AIOSEO This is one of the easiest way to track and fix 404 pages on your WordPress website. AIOSEO means All in One SEO. This plugin is used by over 2 million professionals. AIOSEO allows you to find pages with broken links & fix them with just a few clicks, using the powerful redirection manager. Not just that, AIOSEO also helps you setup faster 301 redirects which helps your website’s SEO in a great manner. For this tutorial purpose, we will be using the AIOSEO Pro Version since it includes the powerful redirection manager addon. First & foremost, you will need to install and activate the AIOSEO Pro plugin. In case, you don’t know how to install & activate a WordPress plugin, check out, how to install and activate a WordPress plugin. Once the plugin is active, go to All in One SEO » Redirects and click the Activate Redirects button. After you have clicked on Active Redirects, visit the ‘Settings’ tab under Redirects to enable 404 logs and track pages with broken links. Scroll down to the Logs sections. Make sure that the 404 Logs option is enabled. Next, select the time period to record the 404 logs using the Drop Down menu. For optimal server performance you can keep it up to one month but not more. Once you are done setting it up, click on the Save Changes button. You will now notice a 404 Logs tab in the Redirects section in AIOSEO. Once you have activated the plugin & done the settings properly, AIOSEO 404 logging actively will look out for 404 errors on your website and will display in the log. The log will give you a list of all the URLs that have a 404 error & the relevant data with it. Once you know which pages have broken links & are giving 404 error, you can simply redirect them by clicking the Add Redirect button. After clicking the button, you’ll see the option to enter a target URL and select the redirection type from the Drop Down menu. You can move a page permanently by selecting the 301 Moved Permanently option. After selecting the option click on the Add Redirect button. The broken link will automatically redirect to the new target URL, if someone tries to visit the page. Slowly but surely over a period of time, the size of your log file will grow, which will in turn take up a lot of space. To make sure that this doesn’t happen, it is best to delete and clear 404 error logs. With AIOSEO, you can easily delete any individual 404 error from your logs by clicking the trash can icon. You can also use the bulk delete option by going to All in One SEO » Tools and then clicking on the Database Tools tab. Scroll down to the Logs section & the click on the Clear 404 Logs button. Conclusion AIOSEO is one of the best plugins to help you track & redirect 404 errors. It can save up a lot of time & energy for you & help with your website’s over all SEO making sure that your website out ranks your competition.
5 Best Review Box Plugin For WordPress Site
WordPress

5 Best Review Box Plugin For WordPress Site

Want to know about the 5 best review box plugin for WordPress site? Looking for a review plugin for your product review website? Let us help you in making the best decision. In this article, we have jotted down the features of 5 review box plugins that we find attractive and easy to use. A review box plugin is generally placed either at the top of your post or in the end. They give your users a quick idea of what you think of the product. You can write a quick description and a summary of your product, give star ratings and individual feature ratings. This way you can convey your thoughts to the user in one glance. These review boxes not only display your opinions but also allows you to take reviews from your users. Let’s see what the features are of different review box plugins and what they have to offer us. 5 Best Review Box Plugin For WordPress Site WP Review Pro WP Review Pro is the most widely used review plugin. It has been provided by MyThemeShop. The plugin comes in free as well as premium version. The free version, obviously, giving less functionality. This is not just another review box plugin. It provides you schema markups for rich snippets. Using this plugin, you can review on topics like places, recipes, products and what not. It will help you get on top of your SEO game. Features of WP Review Pro WP Review Box lets you display all the important things about the product/place that you are reviewing. You can insert the picture of the product/place that you are reviewing, write a short description covering all the key points, give stars for specific functionality like design, ease-of-use etc. and give overall rating. The review box can be placed before, after or in between your content. On top of everything, WP Review Pro provides you with 16 pre-built templates. Hence, you can choose how your review box looks. Not only that, you can also customize the review box further. However, these features are provided only in pro version. Also, there are 5 different rating systems you can choose from. They are: Star Point Percentage Circle Thumbs One of the greatest advantages of using WP Review Pro is, it includes schema markup to help you get the star ratings in Google Search Results. Using WP Review Pro, you can embed real-time reviews from other review websites like Facebook, Google Places and Yelp. It also allows you to display reviews from other people. The users on your website can rate the product, leave a comment or mark other people’s comments as helpful. Additional Features of WP Review Pro Current WooCommerce review forms can be replaced by your custom- made review box. Provides the facility of a pop-up to promote products. Gives you the option to create table, where you can compare the features of different products. Customer Review for WooCommerce Going by the name, you can easily guess what this plugin does. Customer Review for WooCommerce lets you provide your customer with the option to review your product on your WooCommerce store. This not only adds credibility to your product but will also boost your product sales. We cannot deny the fact that real customer feedback is an important thing when we buy anything online. Thus, Customer Review for WooCommerce is an amazing plugin that can help you build confidence in your audience and turn them into customers. The plugin provides you with one-page review form that lets your users review many products using a single form. It will send your customers timely reminder emails to review the product they have bought from your site. You can include dynamic information into the email template easily. It has a very interesting feature that not only makes your customer review the product but can also make him come back and buy again from your website. It provides an option to offer discounts in exchange for reviews. Hence, you can offer a 10% discount off the next order for customer to review your product. There are many more features offered by this plugin. People can attach the pictures of the product they received to the review. Users can filter reviews by ratings and look for trust badges to verify reviewers. Site Reviews Site Reviews is a plugin that allows the visitors of your site submit a rating from 1-5 stars. You can display these reviews in schema markup for Google Rich Snippet. To display review forms on your website, you just need to use a shortcode. It is also available in free as well as paid version. Features Available in Free Version Site Review provides three kinds of blocks. These are: Submit Review Form Display Latest Reviews Display Review Rating Summary It provides you with facility to approve people’s review before they appear on the front-end of your website. Also, you can respond to their reviews and comments. It also lets you assign reviews to certain posts, pages or products. Moreover, it also provides schema markup for rich snippets. One great feature of Site Review is that it automatically adapts to the theme of the site. Features Available in Premium Version With premium version of Site Review plugin, you can customize the review box. It also provides you with options to sort, filter and search for reviews. Users can even attach images to the review in the premium version. Ultimate Reviewer Ultimate Reviewer is yet another review box plugin. The plugin is provided by CodeCanyon. It is not available for free. You have to buy the premium version from their site and install it on your website. Why this plugin is termed as the best plugin is because you can make custom made customer review templates by integrating it with Elementor and WPBakey Page Builder plugins. On the other hand, they also provide a good range of pre-made templates to choose from. Features of Ultimate Reviewer With Ultimate Reviewer, you can

How To Display Code On WordPress Site
WordPress

How To Display Code On WordPress Site

Don’t know how to display code on WordPress site? No need to worry, you have come to the right place for the answer. Do you own a coding blog or WordPress site? Whenever you try to save a WordPress blog post or page it will run through several cleanup filters. This happens to make sure that, no one tries to inject a piece of code through post/page editor in order to hack your blog. In this article, we will teach you a proper way of displaying code on your WordPress blog. How To Display Code On WordPress Site We will show you two methods for displaying code on your WordPress site. You can choose to use the one you like. Display Code Using The Default Editor in WordPress There is a default method used by WordPress to display code. For beginners this is the recommended method. Simply, edit the blog post or page where you want to display the code. On the post edit screen, add a new code block to your post. After adding the code block on your WordPress blog post, it will look something like this, Display Code Using A WordPress Plugin For this method, we will be using a WordPress plugin to display code in your blog posts. This method is recommended for bloggers who often write codes in their blog posts & who’s blog’s are about coding tutorials. This plugin gives you one major advantages over your default WordPress Code Block. That advantage is, syntax highlighting and line numbers are displayed for the code. Due to this, the audience who is learning the code has a better understanding of it. Install and Activate the SyntaxHighlighter Evolved plugin. In case you don’t know how to install & activate a WordPress plugin, then check out our post on how to install and activate a WordPress plugin. After you have activated the plugin successfully, you can edit the blog post to select & add the SyntaxHighlighter Evolved plugin in your blog post. After you have added the SyntaxHighlighter Evolved in your blog posts, it will look something like, Now, you can write whatever code you want in the SyntaxHighlighter Evolved Code Block. Don’t forget to Save or Update your blog post. Preview the changes. Check out the image below, If you are using the old classic WordPress editor, then you should add a PHP code between [PHP]…[/PHP] blocks in your WordPress blog post. Similarly, for a HTML code you can add the code in [HTML]…[/HTML] blocks with the old classic WordPress editor. Conclusion As discussed earlier, if you are a newbie in the field of blogging & doesn’t use code much then you can use the default WordPress Code Block. If you are a professional coder or you have a coding blog the go for the SyntaxHighlighter Evolved plugin. Adding a plugin will definitely improve the highlights, functionality & appearance of the said block.

7 Best User Registration Plugins For WordPress Site
WordPress

7 Best User Registration Plugins For WordPress Site

Don’t know what the 7 best user registration plugins for WordPress site are? User Registration is a very crucial part when you are running a website. Otherwise, to whom are your going to sell your products or generate content for? While running a site, there is a great need to convert your audience into subscribers. If somebody is subscribing you that means that person likes and trusts your content. This is the person that will regularly read your content, buy your product or do mouth publicity for you. Registration forms are not only to gain subscribers. There are a lot of activities for which you need people to register like enrolling for a course, registering for an event or competition, collecting donations and many more. Therefore, a registration form is the most essential tool in a site. In this article, we have listed 7 best user registration forms to help you choose what’s best for you. 7 Best User Registration Plugins For WordPress Site So, without further ado, let’s check out the list. WPForms WPForms is known to be the best plugin for WordPress when it comes to making forms. You can make extensive types of forms using WPForms like Registration Forms, Login Forms, Polls and Survey Forms, Basic Contact Form, Query Forms and many more. It has drag and drop facility and is the smoothest choice for beginners. Also, for non-tech people it is easy to understand and the premium version provides lots of add-ons. It provides a certain number of templates for free version. Using free version, you can also customize your own forms. However, premium version of WPForms is a complete package that unlocks many necessary features such as payment buttons, polls and survey forms, pre-made template for login and user registration form and so on. It also has built-in spam protection and email protection facility. We tested registration and login forms provided in the premium version. We felt that it was easier than any other form. Formidable Forms Formidable Forms are known to be the most advanced form builders for WordPress. Highlighting the word “advanced”, this form builder allows you to make directories, smart calculators, job board listings etc apart from your regular contact forms. It too has a drag and drop interface, which makes it super easy and less time consuming to create the forms. Needless to say, with more advanced features than any other form, it also provides admin with full control and customization. Talking a lot about its advanced feature may make you think it is not for everyone. But it does provide you with all the basic features of a form such as making a registration form, login form or payment forms. If you want less troubles with the form, then you can simply buy their Business or Elite Plan and add registration form to your website. One more thing to highlight here is, you can also create custom password reset pages, user nickname field, custom developer options, auto populate forms and so on. SeedProd Well, SeedProd is not essentially a form plugin. But the reason it made to our list of best registration plugins is simply because it provides attractive landing pages to get your user registered. In simple language, it helps you make a landing page and insert forms that you have made in WPForms. Also, you can customize registration forms made in WPForms into an attractive looking form. With SeedProd, you can make highly-convertible, customizable pages. The large library of pre-made sections and templates is definitely a cherry on the cake. Though you can easily make a registration page with free version of SeedProd but for more features and content blocks, you need to buy the premium version. MemberPress As the name itself suggests, MemberPress turns your site’s audiences into members/subscribers. It is the most used plugin to make membership sites in WordPress. Many entrepreneurs sell their courses or make a member-only WooCommerce store using MemberPress. Apart from a simple registration form, it also takes care of tank you message after registration, making an account for your members and providing them with a login page. It allows you to automate welcome emails or likewise campaigns. The advanced user management feature allows you to list your members by sorting them by date. It requires you no coding skills to make the membership infrastructure. With MemberPress, you can do it in just few clicks. The registration forms can be embedded into your site using a shortcode. WP User Manager WP User Manager lets you create basic registration forms. The forms can be customized according to the admin’s will. Moreover, it gives you full control over the registration page. Its additional features allow you to add user profile pages, set up content restrictions, display directories to your members and send new registration emails. With the premium version, you can add custom fields to your forms, access built-in email verification features, put on social logins, integrate with WooCommerce and ensure GDPR data compliance. The registration form can be added on the site using the shortcodes. OptinMonster The plugin that has proved to increase sales and subscribers is the OptinMonster. WPBeginner say that its is the best email capture plugin and what we tested, proved it right. The elements provided in plugin is designed in such a way to capture maximum subscribers. You can form many different types of dynamic registration forms like popups, slide-in scroll boxes and floating bars. You can also choose from pre made templates to make a dynamic registration form. OptinMonster integrates seamlessly with WPForms. Hence, you can make a pop-up registration using the features of both WPForms and OptinMonster. Using OptinMonster, you can also show a particular message to a particular set of people, thereby, increasing your overall conversion rate. Moreover, it also restricts premium content. This means that you can let only those people read your content who are subscribed to your blog/website. This technique will increase your number of subscribers. ProfilePress Last but not the least,

How To Create Sticky Menu In WordPress Site
WordPress

How To Create Sticky Menu In WordPress Site

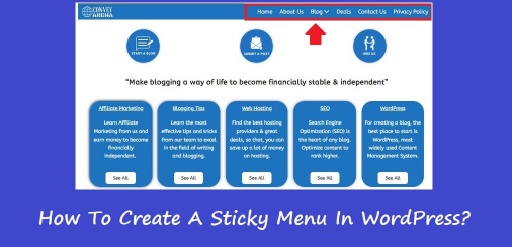
Don’t know, how to create sticky menu in WordPress site? Fret not, you have come to the right place for getting the answer. Sticky menus stay on the screen even when the audience are scrolling down the page. This makes the menu always visible, irrespective of where you are on the page. Having a sticky menu is good for user experience because it makes your website’s navigation easily accessible for the audience. In this article, we’ll show you how to easily create a sticky menu in WordPress. What Is A Sticky Menu A sticky menu is a fixed navigation menu on your website that remains visible at all times even if the user scrolls down & moves around the website. A sticky menu simply sticks to the top of the screen. This is what makes your menu visible to users at all times. Why Is Sticky Menu Required The top menu on the header of your website contains a lot of links that are important to navigate your website. If the menu is made sticky, it will always be visible to the audience, which will save their precious time from scrolling back to the top. This will in turn improve the overall user experience for your website along with conversions & sales. Many WordPress themes available now-a-days have in-built sticky menus in them, to enhance the user experience. But, if your theme does not have an in-built menu, then we will show you how to create one from scratch with two different methods. How To Create Sticky Menu In WordPress Site So without further ado, let’s check out the two methods of how to create sticky menu in WordPress site. Make Your Menu Sticky With A Plugin Out of the two methods, this is the easiest one as it is done by using a WordPress Plugin & is more suitable for people who are just starting out. Install & Activate the Sticky Menu & Sticky Header WordPress Plugin. After you have successfully activated the plugin, go to Settings => Sticky Menu (or Anything!) from the left panel of your WordPress website. Now for the most important step, You will need to enter the Navigation ID of the Menu that you want to make sticky. You will need to use your browser’s Inspect tool to find the Navigation ID used by your navigation menu. Visit your website & right-click on the menu. Click on the Inspect option. After you click on the Inspect option your browser screen will split in two & you will be able to see the source code for your menu. Look out for the line of code that corresponds to your menu. You will find the Navigation ID there. It will look something like, In our case, the Navigation ID is “navigation“ Now, all that needs to be done is to insert the Navigation ID i.e. “navigation” in to the plugin settings with a hash at the start. So our Navigation ID will be #navigation. You will have to enter your website’s Menu Navigation ID in the box, for this method to work for your website. Anyway, by clicking on the Save Changes button at the bottom of the page we will save all the changes & run a test. The menu has become sticky & remains in the same position at all times even when scrolling down the page. Check out the picture below, Make Your Menu Sticky Manually In this method, you will have to manually add a custom CSS code to your WordPress theme. Having said that, making changes to the code of your theme is not recommend for beginners. Visit your WordPress website dashboard & Click on Open The Customizer link to launch the WordPress theme customizer. After the WordPress theme customizer is launched successfully, click to Additional CSS. Now, just add the following code to the Additional CSS pane, Don’t forget to put in your own Navigation ID instead of #navigation in the above code & you are all set. You can also make some changes to your menu, such as, changing background color or decreasing the height etc. Conclusion We presume that now you know all about, how to create sticky menu in WordPress site. You don’t necessarily have to use a theme which has an in-built sticky menu. You can use any theme of your liking & add the functionality yourself. You may also like, How to Make The Sidebar Widgets Sticky In WordPress Site

How To Lazy Load Images In WordPress Site
WordPress

How To Lazy Load Images In WordPress Site

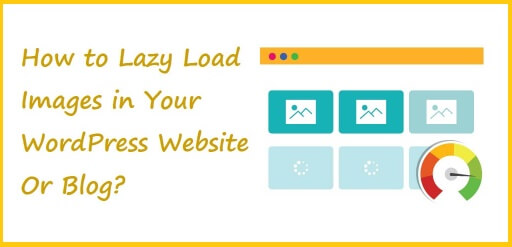
Don’t know, how to lazy load images in WordPress Site? You have come to the right place to know all about it. Lazy load functionality allows your WordPress site or blog to load images from the server, only when a person scrolls down to those specific images. Due to this functionality your blog’s load time is reduced drastically, which in-turn improves the performance. Websites or blogs that are image heavy can use this functionality to speed up their performance. In this article, we will show you how to easily lazy load images in WordPress site or blog. Please note that, the release of WordPress 5.5 added the lazy load feature by default. Having said that, if you want to customize how your images lazy load, and lazy load background images, then you’ll need to use a WordPress plugin. Why Lazy Loading Of Images Is Required As you might know that, images take the most time to load as compared to other web elements. Lazy loading your images can speed up your WordPress website or blog & offer a much better user experience to all the people that visit them. Websites or blogs that load slow, can kill your money making opportunities. A research study suggests that a single second delay in the loading time leads to 7% less conversions, 11% fewer page views, and 16% decrease in customer satisfaction. Besides, search engines like Google do not like slow loading websites or blogs either. Their algorithm is well equipped to rank the slow loading websites or blogs much lower in the search results. You can handle this by using a Content Delivery Network (CDN). But that will solve only half the problem, as the images closer to the location where the audience is viewing them will only load faster. Images that are at far away location from your audience will still take time to load This is exactly why, you need the lazy load functionality for your website or blog. How Does Lazy Loading For Images Work? Now, when someone requests for a page to be viewed by opening a website or by clicking on a link, that request is sent to the server & then page is retrieved from that server. While this entire process is going on, all the images tend to load at once. This causes the website to load slower. If a functionality is added to your website or blog which allows all your images to load lazy rather than loading all at once, then it can save a lot of time. So, with lazy load, the website or blog loads images only the audience scrolls down to those images. Not just the time is save in loading your images, but also the bandwidth is saved resulting in reduced hosting costs. One important thing to remember here is that, though lazy load functionality helps you to improve website or blog’s loading speed, you should always optimize your images before uploading them. How To Lazy Load Images In WordPress Site WordPress plugins can help you easily set up lazy loading for images. In this article we are going to enable the lazy load functionality with the help of two different plugins. Lazy Loading Of Images With WP Rocket Plugin WP Rocket is one of the best WordPress caching plugin out there & it let’s you turn on lazy loading feature smoothly. The plugin also helps you optimize your website or blog speed. To enable image lazy loading, all you have to do is check a few boxes. You can even enable lazy loading for images as well as videos, which will improve your website or blog speed even further. Install & Activate WP Rocket. In case you don’t know how to install & activate a WordPress plugin, check out our post on How To Install And Activate A WordPress Plugin. After you have activated the plugin, go to the media section & check all the boxes under LazyLoad. You are all set & done. Please Note – If you’re using Siteground as your WordPress hosting provider, then you can use the free SiteGround Optimizer plugin that has similar lazy loading features. Lazy Loading Of Images With Image Optimization And Lazy Load Plugin Image optimization & Lazy Load by Optimole plugin is one of the best image compression plugins which allows you to easily lazy load images. But, if you get a traffic of over 5,000 visitors per month, then you will need the premium version of this plugin. Install & Activate the plugin. After you have activated the plugin, go to Media » Optimole and then you need to sign up for an API key. Click on the Register & Email API key & you will receive it in your email. Once you have received the key, enter it & Click on Connect to Optimole Service. After you have entered the key, click on the Settings tab. Now simply enable the Scale images & Lazy load option. This will generate images based on your visitor’s screen size and improve loading speeds. Now, click on the Advanced menu option and select Lazyload. On this screen, you can customize the options available for lazy loading. You can put in a value say ‘3‘ for the Exclude first <number> number of images from lazyload setting. This feature will allow you to stop 3 images at the top from lazy loading, & the remaining images will lazy load. If you want to lazy load all the images the put the value as ‘0‘. You can also enable the Scale Images, Enable lazyload for background images & Enable images for embedded videos and iframes options. After you have enables the required options, don’t forget to Save them before exiting the plugin. Conclusion Even though WordPress has the lazy load functionality in their newer versions, its still crude. You can use the above mentioned plugins to gain full control over all the settings & customize it as you want. We hope you like

How To Update PHP Version In WordPress Site
WordPress

How To Update PHP Version In WordPress Site

Don’t know how to update PHP version in WordPress site? WordPress is primarily built with PHP programming language. At times there is a need to update the PHP version. Using to the latest PHP version improves your WordPress website’s performance & speed dramatically. In this article, we’ll show you how to update the PHP version of your WordPress website. First let’s know, why we should update the PHP Version of WordPress Site Why Update To The Latest PHP Version In Your WordPress Website? As discussed above, WordPress is primarily built with an open source programming language PHP. When you update your WordPress website, you need to update your PHP version as well. As of today, WordPress requires at least PHP version 7.4.21 or greater. The latest stable version available for PHP is 8.0.8. With the latest versions of PHP your WordPress website’s performance is improved, since the background processes are run more efficiently & memory usage is also optimized. This has an impacts on the speed of your WordPress website, making it faster & also reducing the load time. How to Check the PHP Version in Your WordPress Website? You can easily check the PHP version of your WordPress website from your own website. Simply, log in to the admin area of your WordPress website and go to the Tools » Site Health page & click on the Info tab. Now, go to the Server tab & click to expand. This section will show you all the server information along with the PHP version. How To Update PHP Version In WordPress Site All the top hosting companies allow you to easily change the PHP version used by your WordPress website. We will show you a few examples from top hosting providers such as Bluehost, SiteGround & Hostgator. How To Update PHP Version In Bluehost Log In to your Bluehost hosting account & go to the dashboard. Click on the Advanced tab from the left column. After clicking on the Advance tab, you will get multiple option on the right side of your screen. Click on MultiPHP Manager now. After you have clicked on the MultiPHP Manager tab, you will be taken to a page where you will see the current PHP version for your WordPress website. On this page, you can change to the Latest PHP Version. How To Update PHP Version in SiteGround If you are using SiteGround hosting, then Log In to your SiteGround account dashboard. Once you have logged in, you need to go to the Websites page and then click on the Site Tools button. Now, go to DEVS » PHP Manager from the left column. Choose between SiteGround’s Ultrafast PHP & Standard PHP. You can also change the PHP version by clicking on the Edit icon. You will get a popup, where you will have to select Change PHP version manually under the Set PHP Version option. Now, select the latest PHP version, in this case PHP 8.1.0 from the drop down menu & click on the Confirm button. How To Update PHP Version In HostGator First & foremost thing to do is to Log In to your HostGator hosting account dashboard & click on the Hosting section. From here you need to click on the cPanel link under your hosting account. cPanel dashboard will be launched, where you can manage the advanced settings for your hosting account. Scroll down to the Software section and click on the MultiPHP Manager icon. Now, select your website and then choose the PHP version. Click on the Apply button to save the changes. How To Update PHP Version In GoDaddy The first & foremost thing to do is to Log In to your GoDaddy hosting account dashboard & go to My Products section. From there click on Manage in front of the website that you want to update to the latest PHP version. On the next screen, click on cPanel Admin button, When you are in the cPanel section, go to Software tab & then click on Select PHP Version. On the next screen, you will get an option to change your WordPress site PHP version. You can change to the latest PHP version, in this case from 7.4 to 8.0. After selecting the latest PHP version, click on Set As Current, to save the changes. You are all set & done now with updating to the latest PHP version for your WordPress website on GoDaddy hosting account. What To Do After Updating PHP Version of Your WordPress Website After updating the PHP version for your WordPress website, make sure that everything is working as expected. You can open your WordPress website & go through it thoroughly, to check if it’s working fine & nothing is broken. Log In to the WordPress Dashboard of your website & check the Info section to know, if the update has been successful. Conclusion Updating the PHP version for your website will keep your website healthy & error free. This will allow you to gain momentum in this era of competition. You may also like, How To Move Your Blog From WordPress.com to WordPress.org In 5 Easy Steps

Basic Difference Between Plugin And Widget In WordPress
WordPress

Basic Difference Between Plugin And Widget In WordPress

Do you want to know the basic difference between plugin and widget in WordPress? Keep reading to get an overview on plugin versus widget. If you had thought that a WordPress plugin & a WordPress widget is one and the same, then you are highly mistaken. Without further ado, let’s get in to the topic. What Is A WordPress Plugin? A plugin is a piece of software which has a group of functions, that can be amended to your WordPress website. Their basic job is to add new features to your WordPress website. All the WordPress plugins are written in the PHP programming language as that is the language WordPress is developed in. In the WordPress community, there is a saying “there’s a plugin for that”. What it means is that, you don’t need to know any coding for adding a functionality to your WordPress website. You will usually find a plugin for that, which you can simply install & activate. And there are hundreds of thousands of such WordPress plugins available for free at the official WordPress Plugin Directory. Free plugins normally have limited functionality. However, there are many plugins that you will have to purchase, but you can get full functionality with those. Many such companies, which develop WordPress plugins make two different versions of it, free & paid. If you own a WordPress website, you can very easily install all the plugins from your Admin area. Go to Plugins => Add New from the Dashboard of your WordPress website. You can install the plugins directly from the WordPress Plugin Directory. Or you can download the plugins & install it manually by clicking on the Upload Plugin => Browse => Install Now. The free versions of the plugins usually don’t have a tech support. Some of the plugins might be outdated, so choose carefully before installing & activating them, as it might break your WordPress website. Check for how long the plugin is there, whether its updated regularly or not & if it is compatible with your version of WordPress website. What Is A WordPress Widget? Widget is a block of content that you can add to your WordPress website. You can add the widget in many areas such as, sidebar, header, footer etc. When you visit someone’s website and see a subscriber form, a signup form, a contact form or latest posts in the sidebar then remember, those are all widgets. WordPress by default comes with several widgets including categories, tag cloud, navigation menu, calendar, search bar, recent posts & many more. Now here is the thing, where can you add these widgets on your WordPress website completely depends on your WordPress theme. Many themes have sidebar, footer, header & other such areas to add your widgets. You can also add widgets in the post or page of your WordPress website. If you own a WordPress website, you can easily add widgets. Click on Manage Widgets from your Admin area. You will go to your widget area, where you can add or remove widgets from your sidebar, footer etc. To add the widgets from the Available Widgets section to the Sidebar, all you need to do is drag and drop. Basic Difference Between Plugin And Widget In WordPress Many people are confused about the difference between a plugin & a widget in WordPress. You have to install the plugin in your WordPress website & then it’s respective widget gets added to your website. To put it in simple terms, a plugin is the backend of a software & a widget is the frontend of a software. Another example would be, apps and widgets on your smartphone. Plugins are basically apps & widgets are the Graphical User Interface that you see on the screen. Conclusion Some people think that there is no difference between a plugin & a widgets, but that’s not true at all. Widgets are nothing but the extension of plugins, which have a Graphical User Interface. You may also like, How To Install And Activate A WordPress Plugin

5 Best Real Estate Plugins For WordPress Site
WordPress

5 Best Real Estate Plugins For WordPress Site

Are you looking for the 5 best real estate plugins for WordPress site? Many real estate companies have their websites made in WordPress, where they can showcase listings. In this article, we will take a look at the 5 best real estate plugins for WordPress site that can be used to grow the business. 5 Best Real Estate Plugins For WordPress Site So without further ado, let check out the list, WP-Property WP-Property is on of the most versatile WordPress plugins for creating and managing highly customizable real estate websites & showcase them with custom listings. But it is not just made for real estate market. You can showcase many other things like livestock, golf carts & all sort of products. The plugin is easy & flexible to use. All the listings are downloadable in PDF file format as well. Some of the main features include, Flexible extendable filter on all property pages Options such as price, bathrooms, bedrooms, features, address, work out of the box Input fields such as Text Editor, Number, Currency, File and Image Upload, URL, Date and Color Pickers Ajax loading of search results. Localized Google Maps. Check out the demo, Estatik Estatik WordPress plugin helps you create easy-to-use WordPress real estate website for real estate agencies and single agents. It comes in both free & pro versions. The pro version has 3 different plans, Estatik PRO ($89), Developer’s Pack ($129), Premium Pack ($489) The free version includes allows you to create unlimited number of custom fields, save searches & wishlists, advance sorting of products, social sharing, photo gallery & video, slideshow widget, request info widget, customizable search widget, unlimited currencies & many more. The pro version has extra features like agents support, private fields, frontend management, CSV import, subscription plans with payments through PayPal, PDF file generation, map view widget & lifetime updates. The plugin works with most WordPress themes, but you can also get a free theme from Estatik will gels smoothly with it. Check out the demo, Easy Property Listings Easy Property Listings is one of the most dynamic and feature rich Real Estate plugin for WordPress available in the market today. It’s a very easy to use plugin that provides the needed functions to configure a dynamic real estate website in minutes. Packed with advanced features, shortcodes and templates letting you create real estate websites fast. This plugin comes with a free & pro version. The pro version has 3 different plans, Personal ($97), Business ($197) & Developer ($297). Some of the features include, photo gallery, google maps, over 150 custom fields, mobile friendly, grid layout, work with various themes & page builders, available in over dozen of languages and 26 currencies, beautiful image sliders, testimonials, map listings, dashboard widgets. The plugin is best for people who don’t have any coding knowledge as none is required. Check out the demo, Realtyna WPL Realtyna WPL is a flexible yet powerful plugin for WordPress websites that deal with real estate. It also has a fully flexible database management. You can add or remove the fields without custom changing the database. With this plugin you can manage property listings, RETS / IDX / VOW real estate options and scalable features. WPL has lot’s of features and addons for real estate agents and real estate agencies. The plugin is compatible with themes such as, Houzez, Bridge, Enfold, X Theme, Avada, Agent Press Pro & Divi. Realty WPL comes in both free as well as pro version. The pro versions also known as WPL Pro is for $199. You have to pay just one time & get 1 year support & lifetime updates. The plugin comes with several add-ons such as, sms add on, membership add-on, zapier add-on & many more. Check out the demo, Real Estate Pro This plugin is from the famous CodeCanyon repository. It works with the Visual Composer page builder to help build listings and includes Ajax search, reviews and ratings, user submission for listings, subscriptions and payment options to name just a few. The plugin comes with a pro version at $39. Some of the other useful features includes, integration with MailChimp, import with CSV file, multiple email templates & many more. Check out the demo, Conclusion Real estate is a booming industry. More & more websites are being developed in every single. To get an advantage over your competition, you need to make your website more appealing to the audience. The plugins given above will help you achieve that & propel you to the top. You may also like, 7 Best YouTube Video Gallery Plugins For WordPress Site

7 Best YouTube Video Gallery Plugins For WordPress Site
WordPress

7 Best YouTube Video Gallery Plugins For WordPress Site

Want to know about the 7 Best YouTube Video Gallery Plugins For WordPress site? Being a blogger, I wouldn’t deny the power of videos to convert more audience into subscribers. Today, it is thousand times easier to get subscribers on YouTube than on a written blog. Many bloggers have now started created their YouTube channels along with a website. Videos are easier to comprehend, therefore, it attracts more crowd than a written blog. Seeing the rising trend, many companies realized that there is a great need for plugins that connect YouTube channels to WordPress sites. As a result, the market flourished with such plugins. Having said that, we came up with 7 best YouTube gallery plugins that performs very well with a WordPress website. 7 Best YouTube Video Gallery Plugins For WordPress Site So, without further ado, let’s check out the 7 Best YouTube Video Gallery Plugins For WordPress Site. Smash Balloon YouTube Feed What if we tell you, you can list up all your YouTube videos on your WordPress site? I know, there is no bigger plus game for a blogger. Therefore, this YouTube gallery plugin is what you need, if you want your YouTube videos are displayed automatically in a gallery layout. Easy to set up and customize, it gives a facility to hand-pick your favourite videos to be displayed in the gallery. Customize your gallery so it speaks about your brand identity. It also allows you to combine multiple YouTube channels into a single feed. Moreover, all the stats of the video – likes, comments and shares are too, displayed on the site, along with the video. You can even do live streaming on your WordPress website using this amazing plugin. This plugin also provides you the facility to enable the “Subscribe” button, so you can capture the visitors to your site and get them subscribed to your YouTube channel. The plugin is also great for SEO Ranking, as it’s YouTube caching feature ensures that your site loads faster. Smash Balloon YouTube Feed’s free version has very limited features. For more customizations and great features, get yourself a pro version. Envira Gallery With being the best photo gallery plugin for WordPress websites, Envira gallery is now making name for their addon, which allows you to create a gallery of YouTube videos. However, it will not automatically display YouTube videos from your channel. You need to embed them manually. Videos uploaded on Vimeo, Instagram, Facebook, Dailymotion etc. can also be embedded on your WordPress site, using this plugin. With main content area, you can also list your videos in the sidebar as it comes with a drag-and-drop widgets. YouTube Gallery YouTube Gallery plugin too, lets you add YouTube video on your WordPress site. It is best known for its layout, which makes your Website look professional. The plugin comes with a setup assistant that guides you through each step. Hence, you are sure to be on track with setting up the plugin correctly. The unique thing about the plugin is that, it allows you to organize your videos according to specific categories and tags. This makes it user-friendly and SEO-friendly as well. Embed Plus With Embed Plus for YouTube plugin, you can create a YouTube video gallery of your favourite videos as well as your entire playlist. By default, a grid layout will be created. It also allows you to set preferences for playback controls, live streams, auto-plays and premieres. Using shortcodes, you can insert the gallery anywhere you want on the website. It also gives you option to show or hide video information. Automatic YouTube Gallery Create unlimited galleries on your website using Automatic YouTube Gallery. The plugin is a great one as it does not slow down your website. It has caching feature, which keeps your sites’ load time fast. The plugin will itself fetch the playlist and display it on your site. You do not need to sit and embed every URL. It has 5 different UI styles and you can switch to different presenting style in just a click. This is the best plugin when it comes to increasing the user engagement. All In One Video Gallery Well, how good it is to make a beautiful gallery on your website that is SEO-friendly? 100% good enough for every blogger out there. The galleries made with All-in-One Video Gallery are searchable and scalable. Just like Envira Gallery, it lets you embed videos from YouTube, Vimeo, Dailymotion, and Facebook. You can even customize player controls and playback options. There are many more settings, giving you more control of the functions it performs. It lets you categorize your videos, which definitely makes it search-friendly. Total Soft Video Gallery by Total Soft creates a list-like gallery on your site, which makes the collection of your YouTube videos look neat and clean. It provides 9 layouts to present your videos and a number of customizable settings. With YouTube, it also lets you embed videos from Wistia, Vimeos and your own MP4s. It is very much responsive and offers amazing hover effect. You can create unlimited galleries on your site with this plugin. Conclusion A lot of plugins are available in the market but according to us, these are the 7 Best YouTube Video Gallery Plugins For WordPress Site. They would connect easily, without any hassle to a WordPress website and would even make your website look nice and clean. You may also like,   Top 20 Blogging Niches For Bloggers

Track Email Open Rates And Link Clicks With WP Mail SMTP
WordPress

Track Email Open Rates And Link Clicks With WP Mail SMTP

Don’t know, how to track email open rates and link clicks with WP Mail SMTP? You have come to the right place for the answer. It is a myth, that e-mail marketing is dying. Instead, surveys suggest that email-marketing is still in its top-notch game. Most of the sales are made using email-marketing. If you are using email-marketing tools to introduce your product or disseminate your articles then this post is just right for you. Just sending out an email is not enough; you need to see who is responding to your emails. For example, you need to track how many people opened your emails or who clicked on the link in that email. WP Mail SMTP 2.9 has just come up with the right tool, which lets you track the email and click the link in the emails. Track Email Open Rates And Link Clicks With WP Mail SMTP So without further ado, let’s dive right in to the topic. How to Enable Email Tracking in WP Mail SMTP It just employs few clicks and you are ready to use the added feature. First, you need to get WP Mail SMTP Pro for your WordPress site. What All Can You Do With WP Mail SMTP We have already mentioned how this new feature helps you track clicks and opens of your email. But there is more to this feature. Resend WordPress Emails We all have faced a surge in anxiety when an email fails to be sent and we start getting customer complaints. This kind of situation also puts our authenticity into question. However, thanks to the new feature, we can easily resend the failed emails. You just need to click the “Resend” to resend the failed email. Good news is, they added an option to resend the emails in bulk. E-mails in bulk are mostly sent out when introducing new products and offers. If you are running an e-store, this is definitely a plus for you. Save Email Attachments With new feature, you can save the attachments in the email too. The attachments are saved along with the original email. Export the EML The new feature also comes with the facility of EML Export. Using this, you can export individual emails as EML files and open them up in any email client. You can also export multiple EML files in 1 ZIP. Network Aggregated Email Log It might confuse a lot of readers as what this headline exactly means? To answer you in simple terms, if you have multiple sites, then you don’t need to log into your subsites to view the email logs. You can do it at one place. Click the “email address” button and choose the site, you want to access the email logs for. Who is it Good for Reading the whole blog, you might have got the idea whether the new feature is for you or not. Summing up, I would say, it is most beneficial to, 1). People who run e-store, especially, on WooCommerce. This feature can make your life much easier by saving you a lot of time. You can get to know whether a confirmation or an invoice was sent to the customer before getting complaints from them. 2). People who run Affiliate Programs can take a great advantage of this plugin as you would get to know the open rate of your blogs. This would help you know much better which product is currently smashing the industry and hence boost your sales. It will be helpful in designing the content strategy too. 3). People running media sites. It can tell how many of your subscribers are currently engaged with your content. Freelancers can also use this feature to sell their services to the right customers. Conclusion The bottom line is, to keep your small business running, you need to employ email marketing and all its tools. This new feature is a complete suite of services that you need while doing email marketing. Save your time by employing this awesome tool. You may also like, How To Check Email Logs With WP Mail SMTP

How To Move Your Blog From WordPress.com to WordPress.org In 5 Easy Steps
WordPress

How To Move Your Blog From WordPress.com to WordPress.org In 5 Easy Steps

In this article, you will learn how to move your blog from WordPress.com to WordPress.org in 5 easy steps. Many bloggers who are just starting out often start with WordPress.com. But they soon realize that it has a lot of limitations & that’s why they decide to shift to WordPress.org. In this article, we will discuss the step by step process of moving your blog from WordPress.com to WordPress.org. But first let’s talk about, why you should move your blog from WordPress.com to WordPress.org. Reason For Moving Blog From WordPress.com To WordPress.org You can start a blog by simply creating an account on WordPress.com. Having said that, there are a lot of limitations such as the inability to monetize your blog, inability to install plugins, inability to use third party advertisements & many more such things. This is the main reason for many bloggers to move their blog from WordPress.com to a more popular self hosted WordPress.org platform. To understand the basic differences between the two platforms, see our full comparison of WordPress.com vs WordPress.org. If you ask for our opinion we would suggest that you move your blog from WordPress.com to WordPress.org as it gives you a complete control & ownership of your blog and the freedom to monetize it. That being said, let’s take a proper look at how to migrate your blog. The pre-requisite to fulfill before you migrate your blog is to get a domain name & web hosting space from hosting companies like Bluehost or SiteGround. If you are a newbie then you should start with Bluehost because they are the officially recommended by WordPress themselves & they offer good plans for people who are just starting out. How To Move Your Blog From WordPress.com to WordPress.org In 5 Easy Steps So, without further ado, let’s see how to move your blog from WordPress.com to WordPress.org in 5 easy steps. 1). Export Data From WordPress.com The first & foremost thing you need to do is to Sign In to your WordPress.com website & go to your account dashboard. From the left column, you need to click on the Tools » Export menu and then click on the Export All button. After clicking the Export All button your WordPress website will be start getting ready to be exported. Once the website file is ready, a download link will be visible to you. You can simply click on that link to download the file with ‘zip’ extension to your computer. Once you are done downloading the file & saving it on your computer, you will need to unzip it. Inside the file, you’ll find an XML file that has all of your posts, pages, images, comments, custom fields, categories, tags, navigation menus, and other data. Now let’s check out the 2nd step of how to move your blog from WordPress.com to WordPress.org in 5 easy steps. 2). Install & Set Up WordPress Install & Set up a fresh copy of WordPress on your Bluehost hosting account. WordPress is very easy to install, and it only takes a few minutes of your time. When you sign up with Bluehost install WordPress. Once you have installed WordPress, it is now time to import your data to your new self-hosted WordPress website. Let’s check out the 3rd step of how to move your blog from WordPress.com to WordPress.org in 5 easy steps. 3). Import All The Content To import all the content you first need to login to your newly installed WordPress website’s Admin section. From here you need to go to the Tools » Import page and click on the Install Now button below WordPress. After the WordPress importer is installed, click on the Run Importer to continue further. After you are done running the importer, it will take you to a screen where you will be asked to upload your WordPress.com XML file that you have downloaded from your WordPress.com website. Select the XML file from your computer by clicking the Choose File button & then click on Upload File And Import button. When you importing process begins, you will get an option of assigning imported content to an existing user or create a new user. You’ll also get an option to import the file attachments. Check this box, so that your image files are properly imported. 4). Setting WordPress.com Blog To Private If you don’t want to redirect your old audience to your newly installed website, then this step will show you how to do it. Visit your old blog’s WordPress.com dashboard. From the left menu, you need to click on Manage » Settings menu and scroll down to the Privacy section. Select the Private option and then click on the Save Settings button. This will make your old WordPress.com blog private, and it will only be visible to you or other logged in users that you approve. Having said that, if you have been blogging for a while & you have generated a loyal audience, then it doesn’t make any sense to leave them hanging. Moreover, the chances are that your blog has been indexed by Google and other search engines as well. So the best possible solution is to redirect all your audience to your new blog by following the next step. 5). Redirecting Your Audience To Your New Blog Redirecting your audience to the new URL with the 301 header is a standard solution while moving a website from one location to another. Since you don’t have access to .htaccess on WordPress.com, you cannot make any changes by yourself. Having said that, WordPress.com offers a paid upgrade feature called, Site Redirect, which provides the required functionality. Go to WordPress.com blog’s dashboard and click on the Manage » Settings menu item. Under the Site Address option, click on the Redirect link. On the next screen, you will be asked to provide the domain URL where you want visitors to be redirected. Enter your new WordPress.org website’s URL and click on the Go button. Please

Scroll to Top